With Latch, there are multiple ways to unlock your doors, giving you the ability to use the one that works best for you.*
Latch App Unlock via Bluetooth
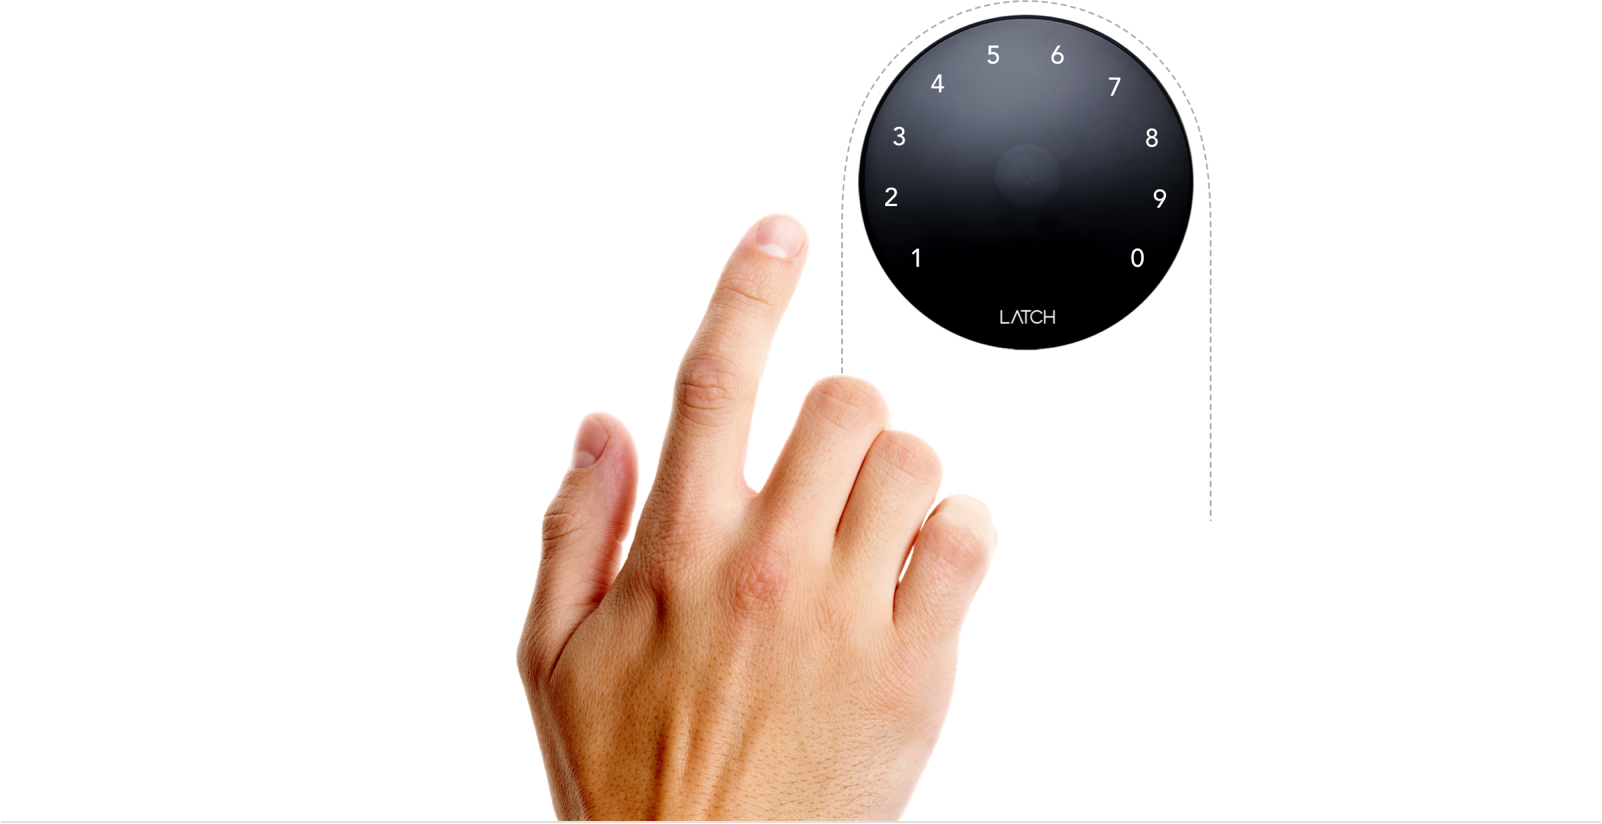
Hold Near to Unlock
For both iOS and Android users, the Latch App will perform an unlock via Bluetooth near any door you have access to and have the Latch App open. To initiate an unlock, simply open the Latch App, hold the phone close to the black Latch Lens on the device, and the Latch App will automatically find and unlock the right Door.
There are additional Hold Near to Unlock settings available for Android users:
-
If your Latch App is unlocking from too far away, navigate to 'My Profile' in the left menu and change the 'Unlock distance' to 'Near' instead of 'Nearest.'
-
If the Latch App is not unlocking when you hold your phone up to it, navigate to 'My Profile' in the left menu, ensure 'Hold Near to Unlock' is on and, if needed, change the 'Unlock distance' to 'Nearest.'
-
You can turn off Hold Near to Unlock by navigating to 'My Profile' in the left menu.
Tap to Unlock
You may also initiate a Bluetooth unlock in the Latch App via the blue 'Unlock' button. To do so, open your Latch App, swipe up on My Spaces/Doors, select the door you'd like to open, and tap the blue 'Unlock' button.
Doorcode
When property managers enable doorcodes for a specific door, users who have access to that door receive a doorcode they can use as another unlock method. Doorcodes are unique and created directly by Latch, and no two users at a single property will ever be granted the same doorcode for a given door or set of communal doors. As you are the only one who is given a specific doorcode, it's important not to share the doorcodes in your Latch App (see the section on inviting guests for additional information on sharing access).
Note: Changing doorcodes for communal doors requires manager assistance. For security purposes, we do not recommend sharing your personal doorcodes. To provide guest access, please use the steps in this article on letting a guest in.
Where can I find my doorcodes?
To view your doorcodes, you'll need to be logged in to the Latch App. Once logged in, select the menu on the top left-hand side, and choose 'My Doorcodes.'
Performing a doorcode unlock
While at the Latch device, to enter a doorcode, simply tap the lens of the device to illuminate the LEDS and using the pad of your finger enter your doorcode.
-
Enter each subsequent digit within five seconds. The Latch device will timeout and erase your entry if you do not enter a digit after five seconds. This is to ensure that if you get one wrong, you can try again.
-
Tap the digit with the pad of your finger to ensure the Latch Lens registers your finger. Ensure one of the circular status LEDs light up every time you input a digit.
-
If a status LED does not light up after you input a digit, it means your finger was not detected. After entering all seven digits, the circular status LEDs should make a full circle to indicate the unlock is successful. If the Lens flashes twice, you may have entered the doorcode incorrectly or the device may not be updated (for steps on how to update your door, please see this article). If the lens' LED's turn off, please attempt your doorcode again as the lens has likely timed out.
There are two types of doorcodes, Residence Doorcodes and Communal Doorcodes.
Residence Doorcodes
For doors that are set up as a "residence" by managers, Latch App users are provided a single doorcode specific to that door (and unique to each user). This 7-digit doorcode is randomly generated to ensure security. Once the door has been unlocked by the resident via the Latch App (or a manual door update has been performed), the doorcode will work until the user has been removed and the door has been updated.
Communal Doorcodes
For doors that are set up as building entrances, communal, or service doors, Latch App users will receive a single unique doorcode for these doors. That said, no two users at the same property will ever be assigned the same communal doorcode. Doors that are connected such as wifi or ethernet connected Latch R's will automatically have the doorcode updated and should work within a few minutes of the user being added. If communal doors are not internet connected, a door updated is necessary to sync your doorcodes to that door.
Can I change my doorcode?
If you would only like to change your residence Doorcodes, you can now do so directly from your Latch App in iOS or Android:
- Open your Latch App.
- Navigate to the section My Spaces and locate the residence door you want to modify he doorcodes for and tap on the door's name. Alternatively, navigate to the Main Menu (sandwich bars on the top left corner of your App) and then to My Doorcodes.
- Tap on the options button on the far right of the Doorcode section.
- Tap on Reset my Doorcode and confirm.
If you would like to change your communal Doorcodes, please reach out to your property management team or host and ask them to revoke all of your current access and then re-grant it, as this will generate a new Doorcode(s) for your account (this will also update your residence Doorcodes).
Please note that to ensure that the prior Doorcode(s) is no longer valid on any non-internet connected Latch devices (such as the one on an apartment unit door), a door update must be performed once you are re-invited to access your doors with the Latch App to remove the old doorcode from your door.
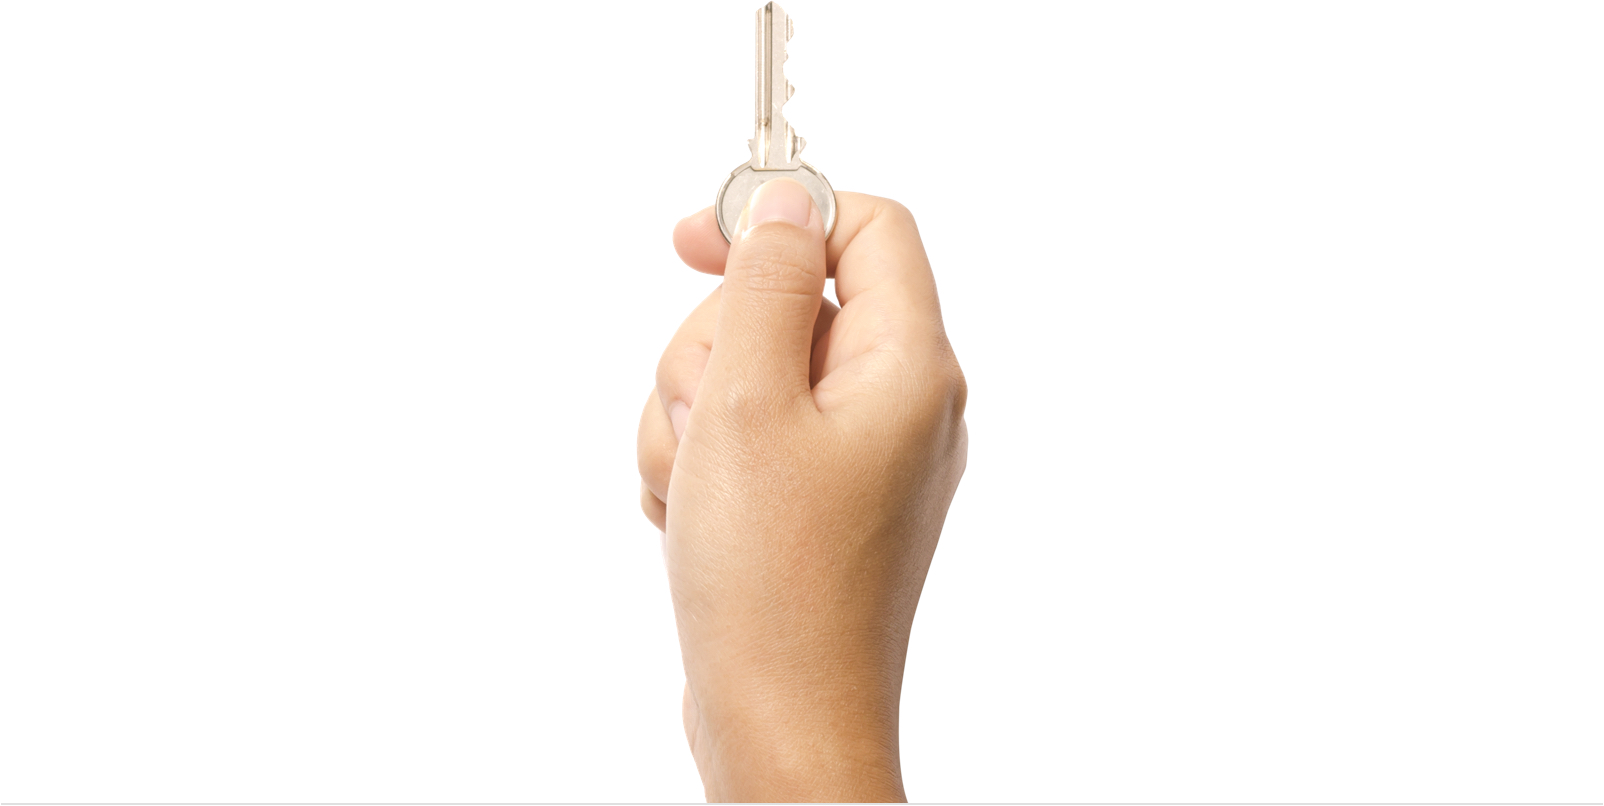
Latch Keycard
Latch Keycard is a physical credential to work across any door in any building you have access. It leverages a secure process -- similar to setting up a credit card, and is easy to set up and use.
Activating a Latch Keycard
If your property management team has not activated your Latch keycard, or you have Latch access across multiple properties (or have both Guest and Resident access to the same property), you can activate the keycard by following the below steps:
- Go to keycard.latch.com
- Select 'Activate'
- Enter the serial number printed on the Keycard
- Enter your Latch email (that you login into the app with)
- Open your email and press 'activate'
- Follow the instructions to add Keycard to your doors.
Performing an Unlock with a Latch Keycard
Tap the Latch device lens to wake the device and present your Keycard.
Deactivating a Latch Keycard
You can easily deactivate your keycard if it's lost, stolen, or you no longer need it.
- Go to keycard.latch.com
- Select 'Deactivate'
- Enter your Latch email address (that you use to login to the app)
- Check your email and confirm the deactivation
- Your property management will be informed to update your device to ensure the Keycard no longer works, but you can also update your device using the Latch App.
How do I get a Latch Keycard?
Contact your property manager for your building's policy on Keycard.
Can I have more than one Keycard?
You can only have one active keycard at any one time.
Mechanical Key
Certain devices are compatible with mechanical keys. If you don't manage your own Latch device, please check with your property management team for additional questions on mechanical keys.
Android Users: Near Field Communication (NFC) Unlock
Near Field Communication (NFC) is a specialized protocol for objects to communicate with one another. It works within a few inches, making it a particularly reliable and fast way to unlock Latch locks. It is also the protocol used for things like Latch Keycard, Apple and Google Pay, and everyday key fobs.
How do I enable NFC unlock for my Android phone?
If you are using the latest version of the Latch App for Android, NFC is automatically turned on. Please note, your phone will only use NFC if the lock you're trying to unlock is running the latest firmware version. If the lock does not have a supported firmware version, the Android Latch App will default to Bluetooth unlock.
Why is NFC available on Android but not iOS?
Unfortunately, Apple does not currently allow NFC to be used to unlock doors. We’re continuing to work hard to make this feature available for Latch iOS users.
Can I turn off NFC?
You can turn off NFC under Settings. Once off, your Latch App will use Bluetooth to unlock your door.
What is unlock from background?
Using NFC, you may be able to unlock your door without unlocking your phone or opening the Latch App. To do so, you must have the latest version of the Latch App for Android and your Latch devices must be running a specific firmware version. You can opt-in to unlock from background in Settings.
What if my phone gets lost or stolen and unlock from background is enabled?
Depending on your device and the version of the Android operating system, you may be able to remotely wipe and restore your Android phone. Please check with your device manufacturer and Google’s Android support.
iOS Users: Unlock with Siri, Latch App for Apple Watch, and the Latch Widget
Unlock with Siri
At common area or entrance doors, iOS users can use Siri to perform an unlock. To do so, navigate to your Spaces/Door List, tap on any door, and select “Add to Siri.” Next, you will be asked to choose a phrase that you will use as a voice command with Siri. You can use the suggested phrase or create your own. To unlock with Siri, simply say “Hey Siri,” followed by your chosen phrase as you approach your lock. Note: Unlock with Siri is only available at common area or entrance doors, and is not available at private unit doors.
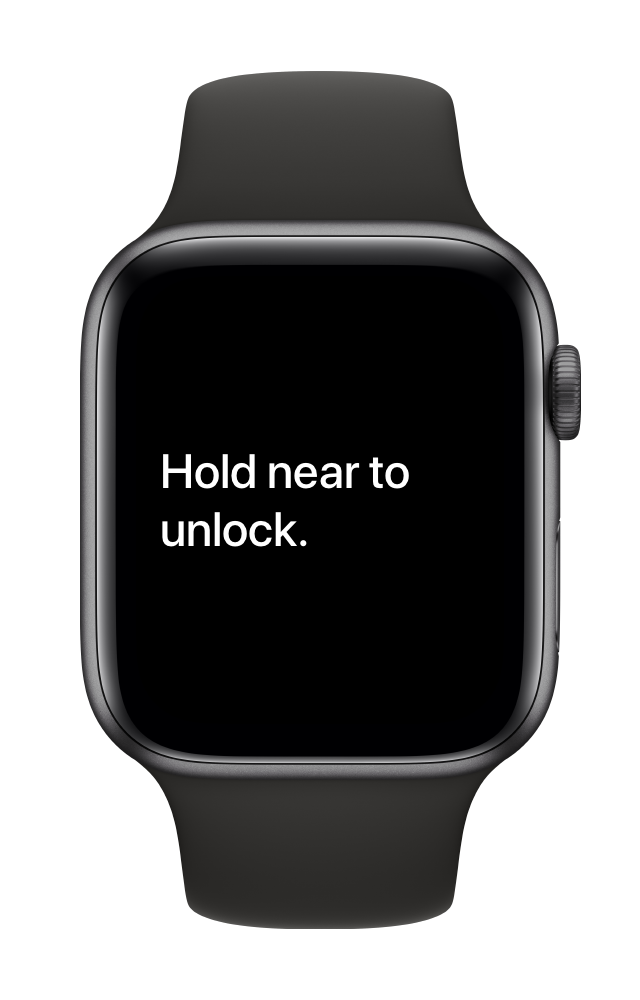
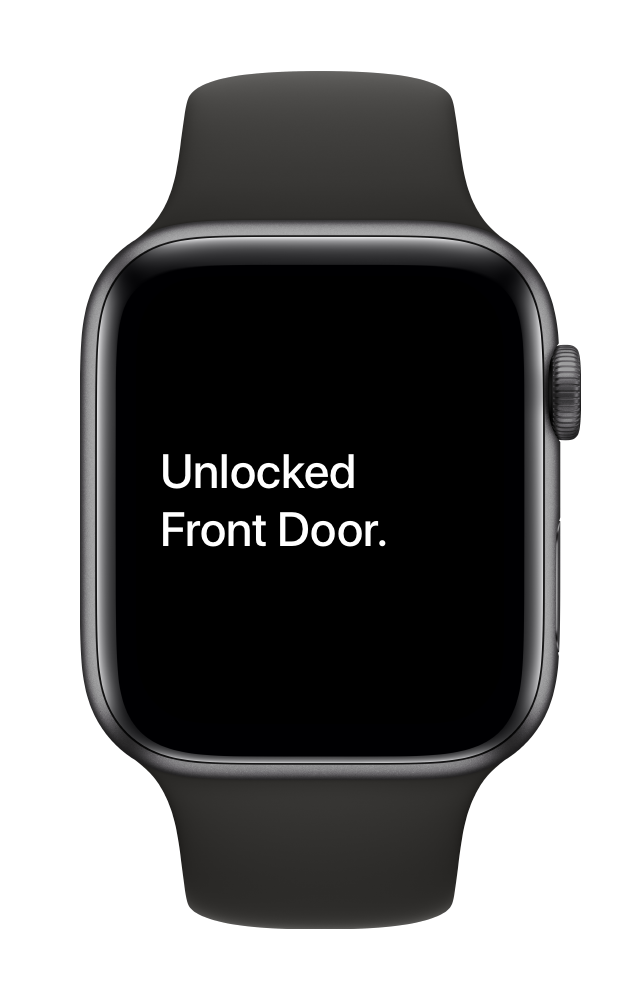
Latch App for Apple Watch
The Latch App for Apple Watch is a hands-free and phone-free way to unlock your Latch devices. For instructions on how to set up and use the Latch App for Apple Watch, check out this article.

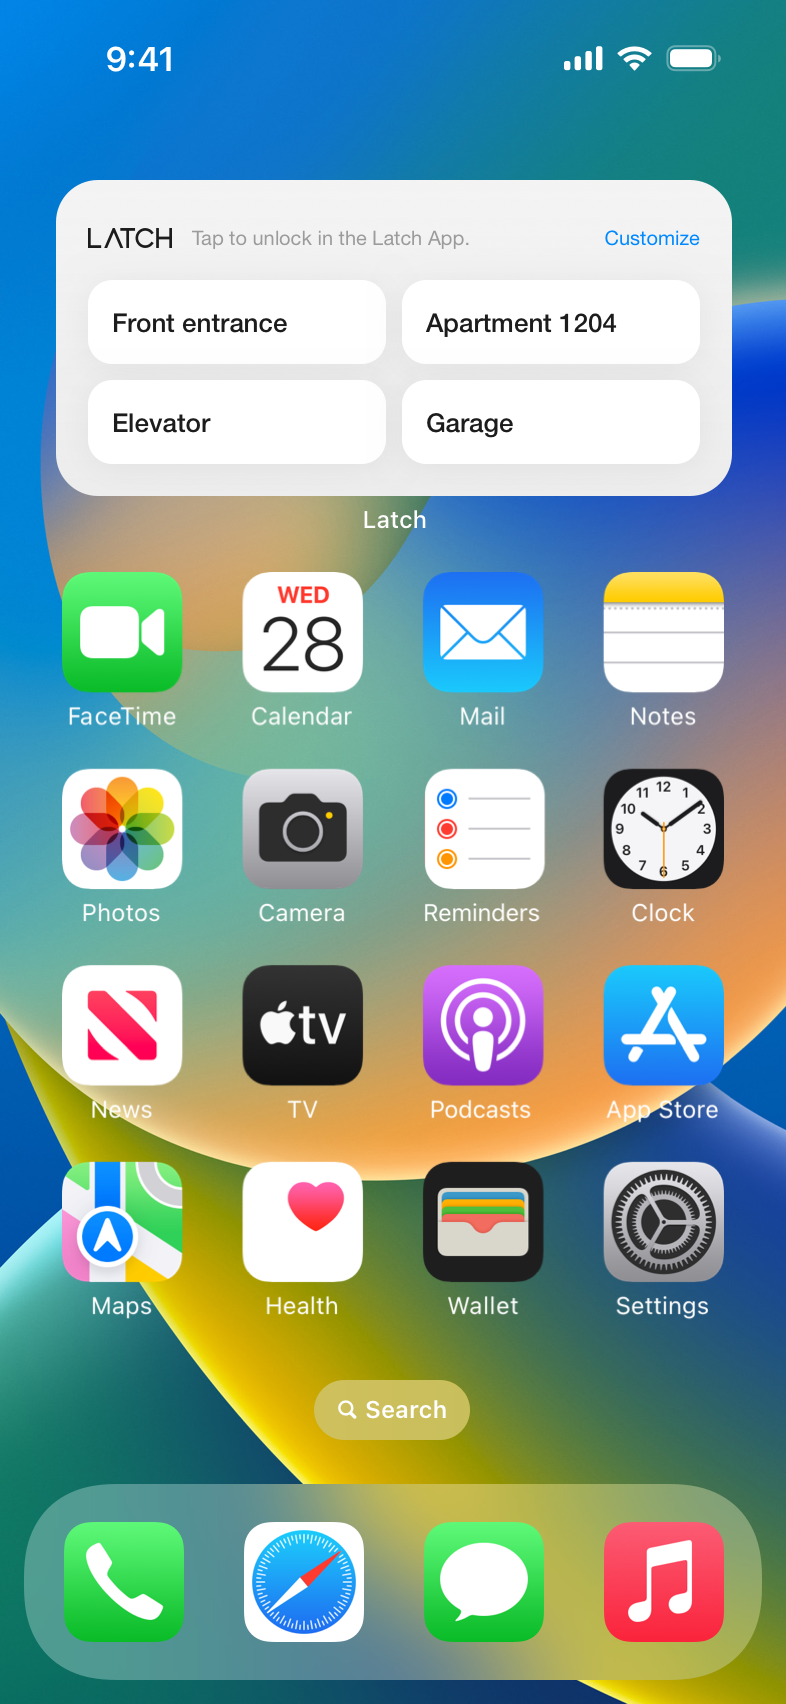
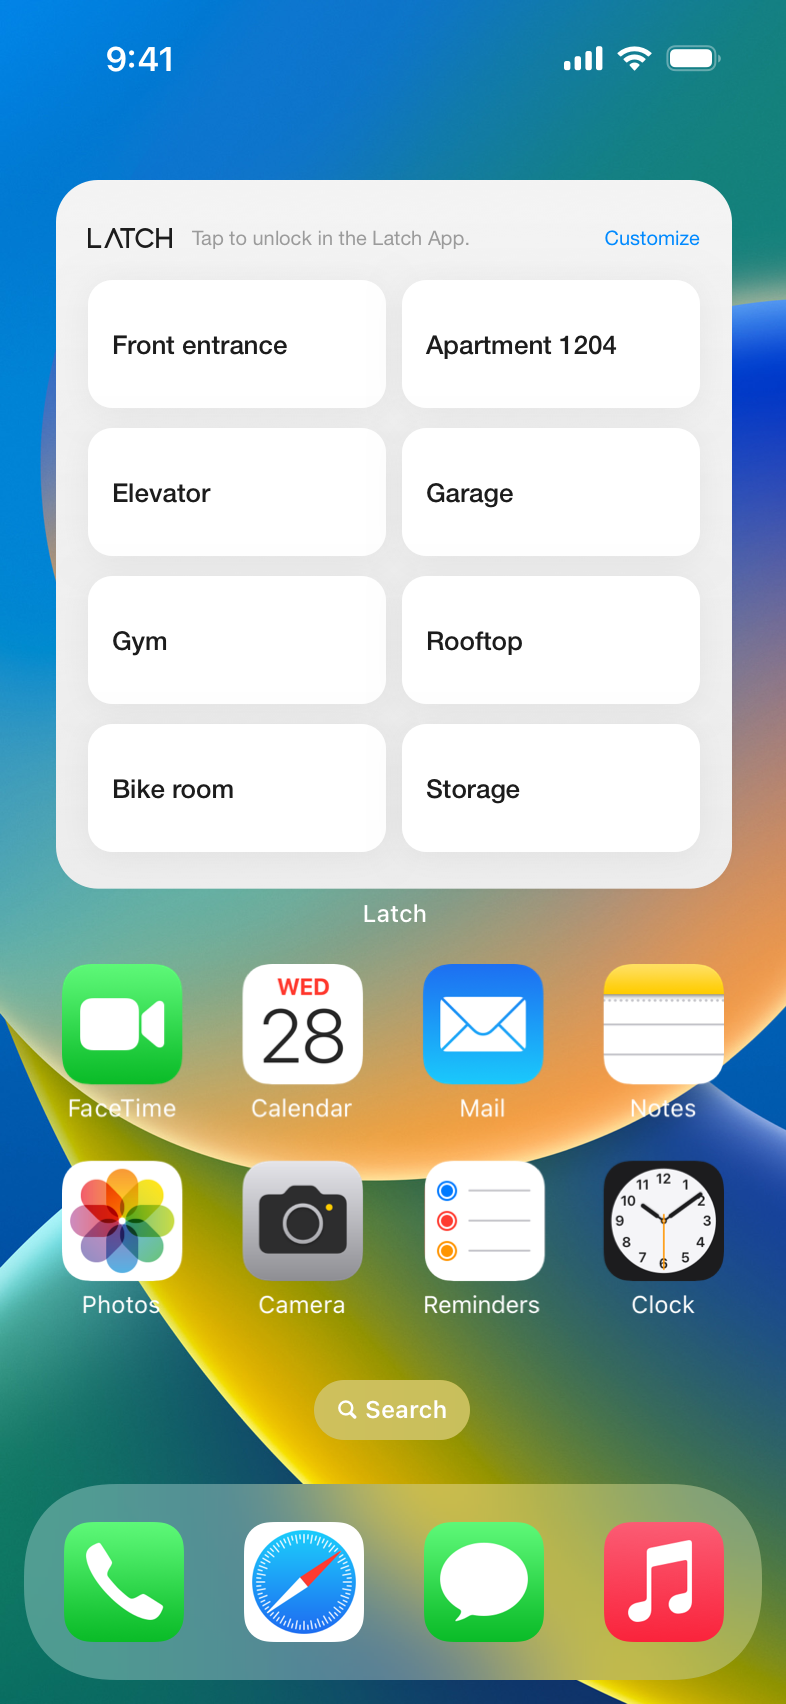
Latch has three different iOS widgets available: the Lock Screen, Concierge, and Access widget. Each widget is designed to allow users to utilize their preferred Latch services and experiences with ease. For information on how to set up widgets, please see this article from Apple.
Access Widget
The Access widget comes in two different sizes (medium and large) and allows you to place a widget on your home screen with your preferred doors. Once the Access Widget is set up, selecting a door will open the Latch App and initiate an unlock. With the Home Screen Access Widget, you are able to unlock your doors more quickly and set up pathways of your preferred doors that you utilize on a regular basis. The medium widget allows you to have up to four doors selected, and the large widget allows you to have up to ten doors. You can configure which devices are in the widget by navigating to your Latch App, selecting the menu on the top left-hand side, and selecting "widget."
Lock Screen Widget
The Lock Screen widget allows iOS users to place a widget on their customized lock screen. For information on how to add a Lock Screen widget please see this article from Apple.
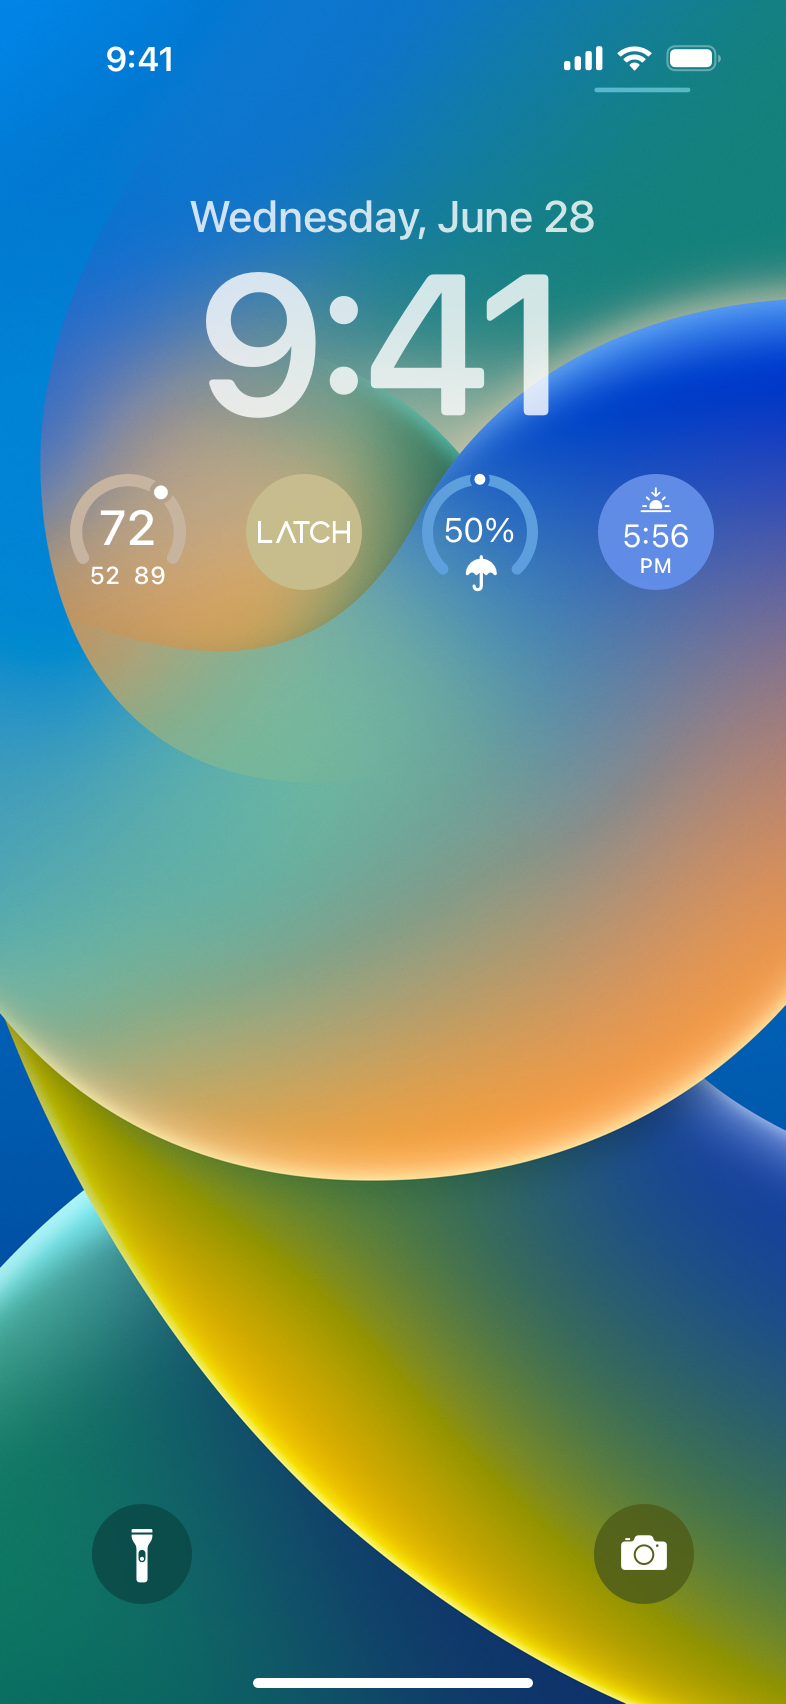
The Lock Screen widget allows you to press the widget and open the Latch App directly from your lock screen. You will need to ensure your phone is unlocked with FaceID or your personal PIN in order to navigate. While an unlock does not initiate immediately upon the app opening, you can proceed to use Hold Near to Unlock to immediately start unlocking your doors.
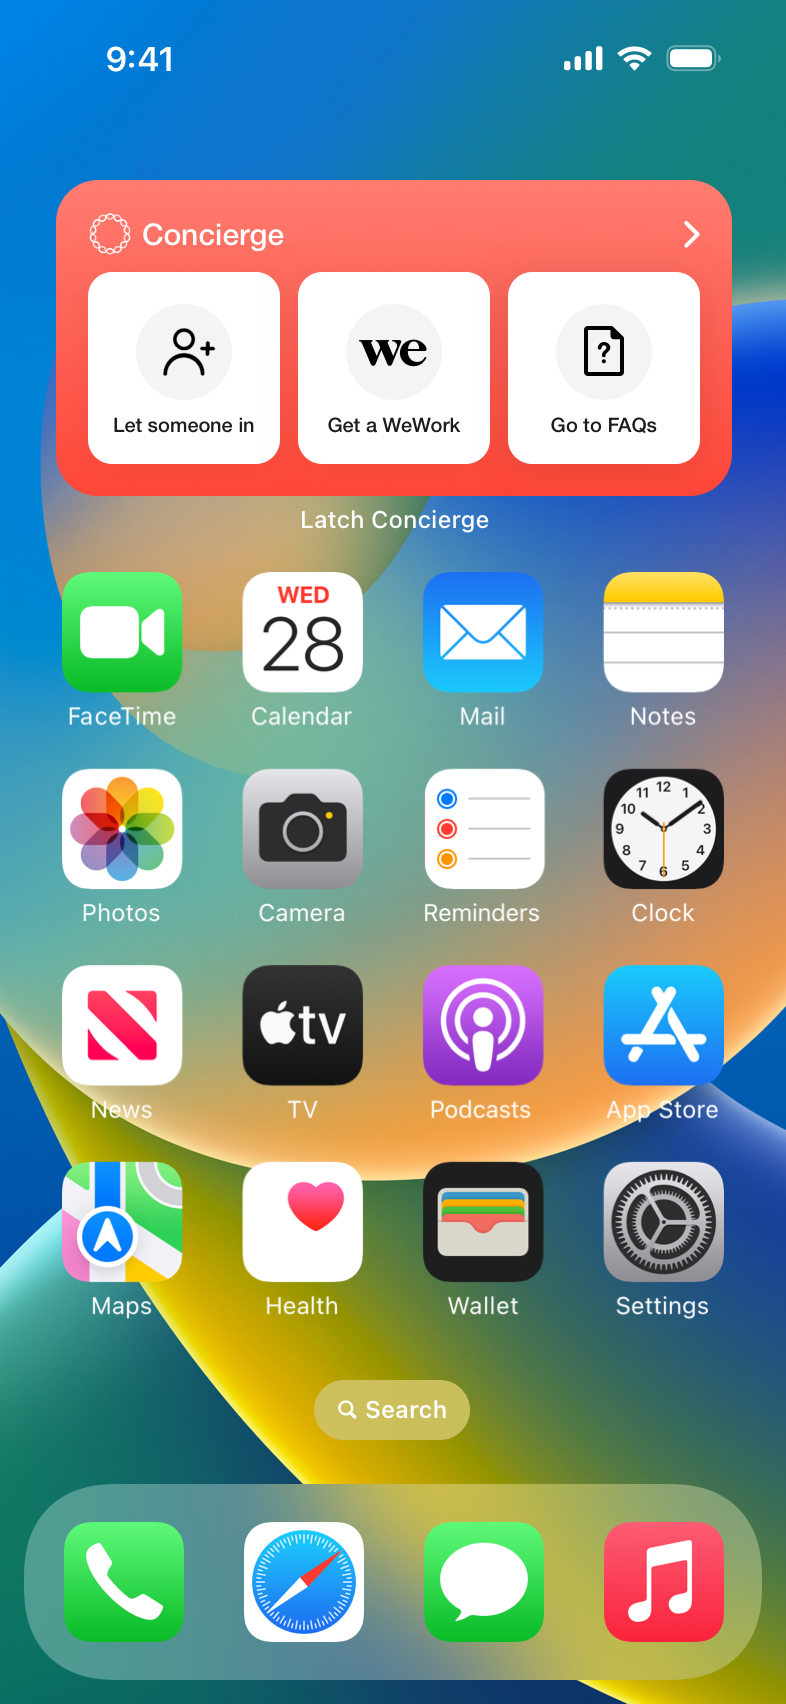
Concierge Widget
The Concierge Widget puts additional Latch services directly on your Home Screen. This widget smartly updates to put the best Latch services that are available to you on your screen. Services that are available are in some cases decided by the building you live in, and your eligibility for specific pilots. By pressing on any of these services in the Concierge widget, it will bring you to that service directly in the Latch App. The hierarchy in which services are displayed cannot be customized at this time).
* Whether certain unlock options, such as doorcodes, mechanical keys, and keycards, are available depends on policies put in place at the property level. For questions about the availability of these unlock options at your property, please contact your property management. If you are managing your own Latch device and have questions about these options, please reach out to Latch Support at Support@latch.com.